06 Nov 2022
You might remember my blog posts from 2016 where I documented my dnsmasq setup.
I run a primary setup on NetBSD and a secondary on Debian.
(Checkout the linked blog posts if you are interested)
The reasons and use-cases are still the same but this time I gave NixOS a chance since
it was time to upgrade the Debian installation.
It was surprisingly easy after a few start hurdles, where I struggled to get any output on my 4k display.
Using a older 1080p monitor solved that for me.
Getting started
Since I used a Raspberry Pi 3 I could use the latest AArch64 image from Hydra (source: https://wiki.nixos.org/wiki/NixOS_on_ARM#Installation).
In my case that was the release-22.05 https://hydra.nixos.org/job/nixos/release-22.05/nixos.sd_image.aarch64-linux.
Unpacking and flashing this image to the SD Card works the same as with all other Raspberry Pi images.
Make sure you flash it to the correct device!
wget https://hydra.nixos.org/build/197683332/download/1/nixos-sd-image-22.05.3977.f09ad462c5a-aarch64-linux.img.zst
unzstd nixos-sd-image-22.05.3977.f09ad462c5a-aarch64-linux.img.zst
cat unzstd nixos-sd-image-22.05.3977.f09ad462c5a-aarch64-linux.img > /dev/sdX
After doing this it should be possible to boot up NixOS for the first time.
Basics
Start with generating a basic configuration with:
sudo nixos-generate-config
Lets add a user and some packages (vim and ping) which I want to have on my new system.
# Define a user account. Don't forget to set a password with ‘passwd’.
users.users.l33tname = {
 isNormalUser = true;
 extraGroups = [ "wheel" ]; # Enable ‘sudo’ for the user.
};

# List packages installed in system profile. To search, run:
# $ nix search wget
environment.systemPackages = with pkgs; [
 vim
 inetutils # ping
];
Network
The networking is a bit more involved.
I need a static IPv4 and IPv6.
Default routes and DNS server.
Very straight forward after I understood the concept.
networking.useDHCP = false;
networking.interfaces.eth0 = {
useDHCP = false;
ipv4.addresses = [
    { address = "192.168.17.7"; prefixLength = 24; }
];
ipv6.addresses = [
    { address = "2001:XXXX:XXXX::7"; prefixLength = 64; }
];
};
networking.defaultGateway = { address = "192.168.17.1"; interface = "eth0"; };
networking.defaultGateway6 = { address = "2001:XXXX:XXXX::1"; interface = "eth0"; };
networking.nameservers = [ "127.0.0.1" "8.8.8.8.8" ];
Dnsmasq
UPDATE: take a look at the update configuration
for NixOS 23.05 where i fetch the hosts file from a url.
Last the main event to configure my dnsmasq server the same way I did on my Debian.
And as you can see from the config I just created a hosts.txt
file which will be merged with /etc/hosts.
(I am thinking about fetching this file from a local webserver or git repo)
# List services that you want to enable:
networking.hostFiles = [ /etc/nixos/hosts.txt ];
services.dnsmasq.enable = true;
services.dnsmasq.alwaysKeepRunning = true;
services.dnsmasq.servers = [ "85.214.73.63" "208.67.222.222" "62.141.58.13" ];
services.dnsmasq.extraConfig = "cache-size=500";
Putting it all together
This gives me a config which looks something like this:
{ config, pkgs, ... }:
{
  imports =
    [ # Include the results of the hardware scan.
      ./hardware-configuration.nix
    ];

  # Use the extlinux boot loader. (NixOS wants to enable GRUB by default)
  boot.loader.grub.enable = false;
  # Enables the generation of /boot/extlinux/extlinux.conf
  boot.loader.generic-extlinux-compatible.enable = true;

  networking.hostName = "nixos"; # Define your hostname.
  # Pick only one of the below networking options.
  # networking.wireless.enable = true;  # Enables wireless support via wpa_supplicant.
  # networking.networkmanager.enable = true;  # Easiest to use and most distros use this by default.

  # Set your time zone.
  time.timeZone = "Europe/Zurich";

  # Select internationalisation properties.
  i18n.defaultLocale = "en_US.UTF-8";

  # Define a user account. Don't forget to set a password with ‘passwd’.
  users.users.l33tname = {
     isNormalUser = true;
     extraGroups = [ "wheel" ]; # Enable ‘sudo’ for the user.
  };

  # List packages installed in system profile. To search, run:
  # $ nix search wget
  environment.systemPackages = with pkgs; [
     vim
     inetutils # ping
  ];

  networking.useDHCP = false;
  networking.interfaces.eth0 = {
    useDHCP = false;
    ipv4.addresses = [
        { address = "192.168.17.7"; prefixLength = 24; }
    ];
    ipv6.addresses = [
        { address = "2001:XXXX:XXXX::7"; prefixLength = 64; }
    ];
  };
  networking.defaultGateway = { address = "192.168.17.1"; interface = "eth0"; };
  networking.defaultGateway6 = { address = "2001:XXXX:XXXX::1"; interface = "eth0"; };
  networking.nameservers = [ "127.0.0.1" "8.8.8.8" ];

  # List services that you want to enable:
  networking.hostFiles = [ /etc/nixos/hosts.txt ];
  services.dnsmasq.enable = true;
  services.dnsmasq.alwaysKeepRunning = true;
  services.dnsmasq.servers = [ "85.214.73.63" "208.67.222.222" "62.141.58.13" ];
  services.dnsmasq.extraConfig = "cache-size=500";


  # Enable the OpenSSH daemon.
  services.openssh.enable = true;
}
After that we can build and install this config.
It helps to set a password for the newly created account.
sudo nixos-rebuild switch
passwd l33tname
After a reboot lets see if everything booted correctly and
you can login over ssh with the new user.
Misc
Over all it was a pleasant experience to setup NixOS.
I think to keep it up to date I will run nixos-rebuild switch --upgrade from time to time.
A thing I used a bunch is the options search from NixOS at:
https://search.nixos.org/options to read the docs for config keys or
finding the correct config key.
Last but not least I want to point to these four resources which helped me to understand how to configure my system.
27 Aug 2022
I planned to write this blog posts ~2 years ago.
But for some reason I never did.
It is about how I mounted my router (see: hEX S The Good The Bad The Ugly),
and my primary and secondary Raspberry Pi running DNS (see: DNS Server on NetBSD and DNS Server on Debian).
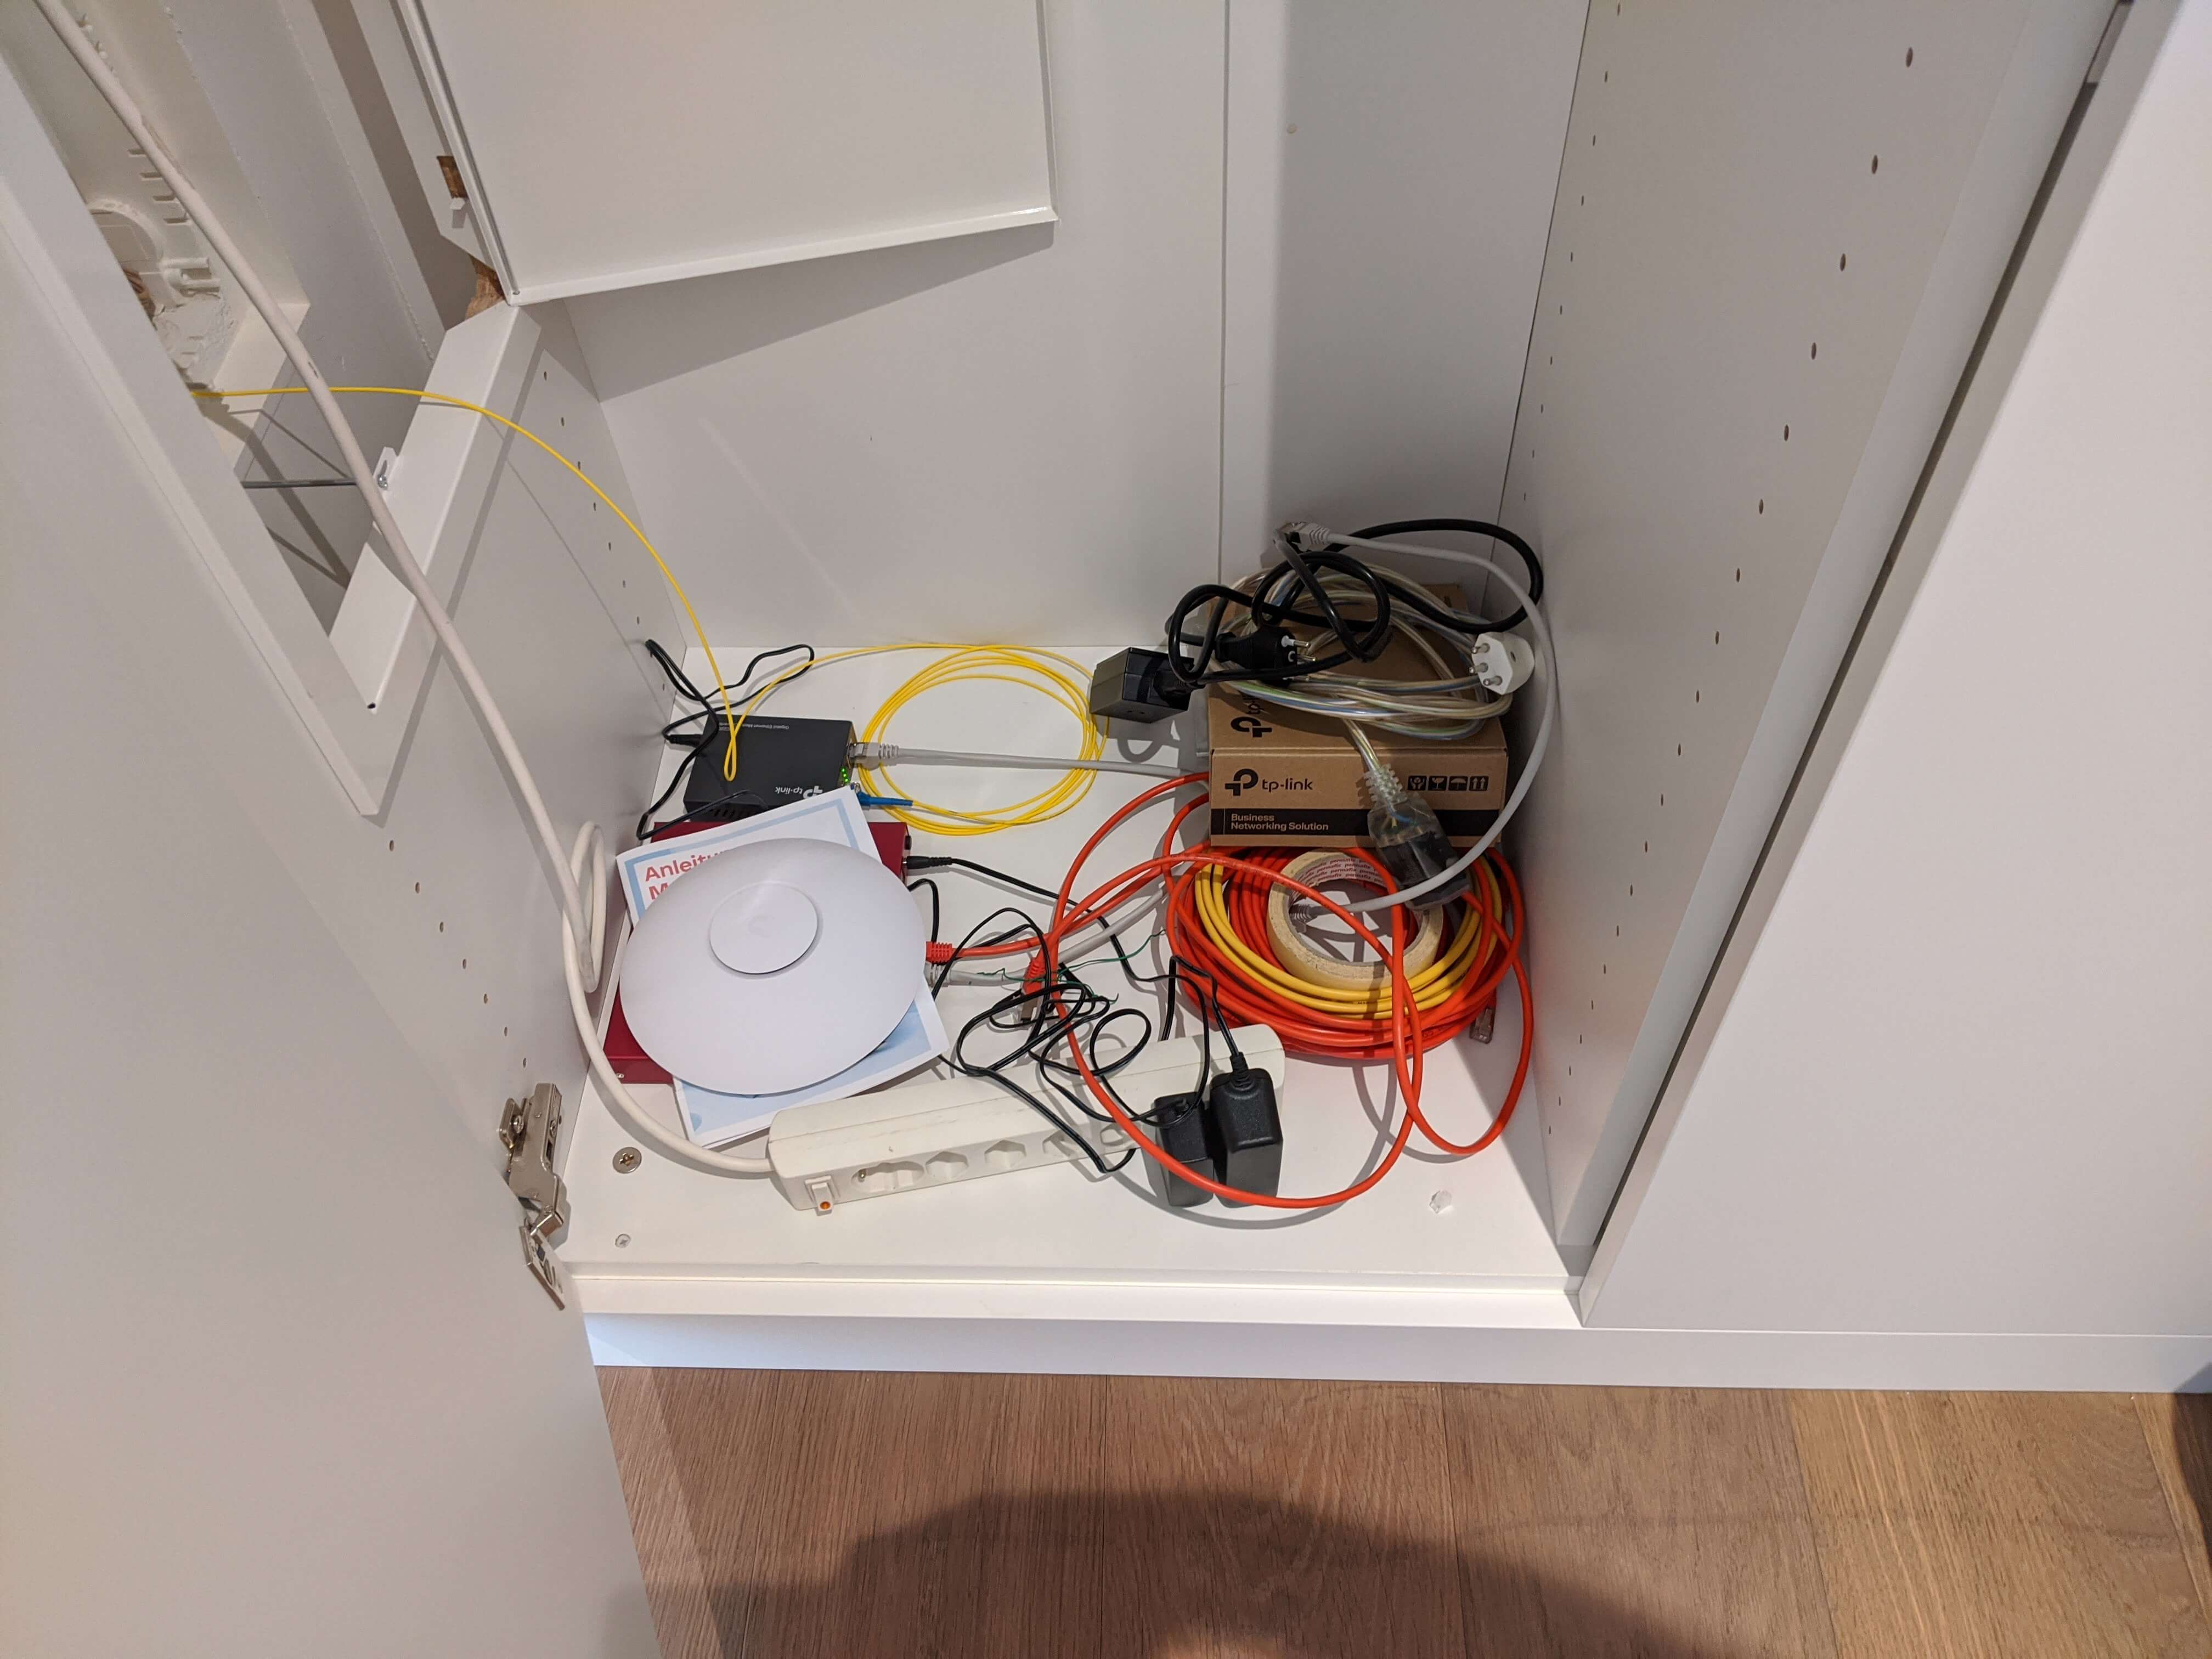
Iteration 1
As you can see the first iteration of this setup was just to dump all the devices on the ground and get them running.
This was even before I switched to the hEX S router.
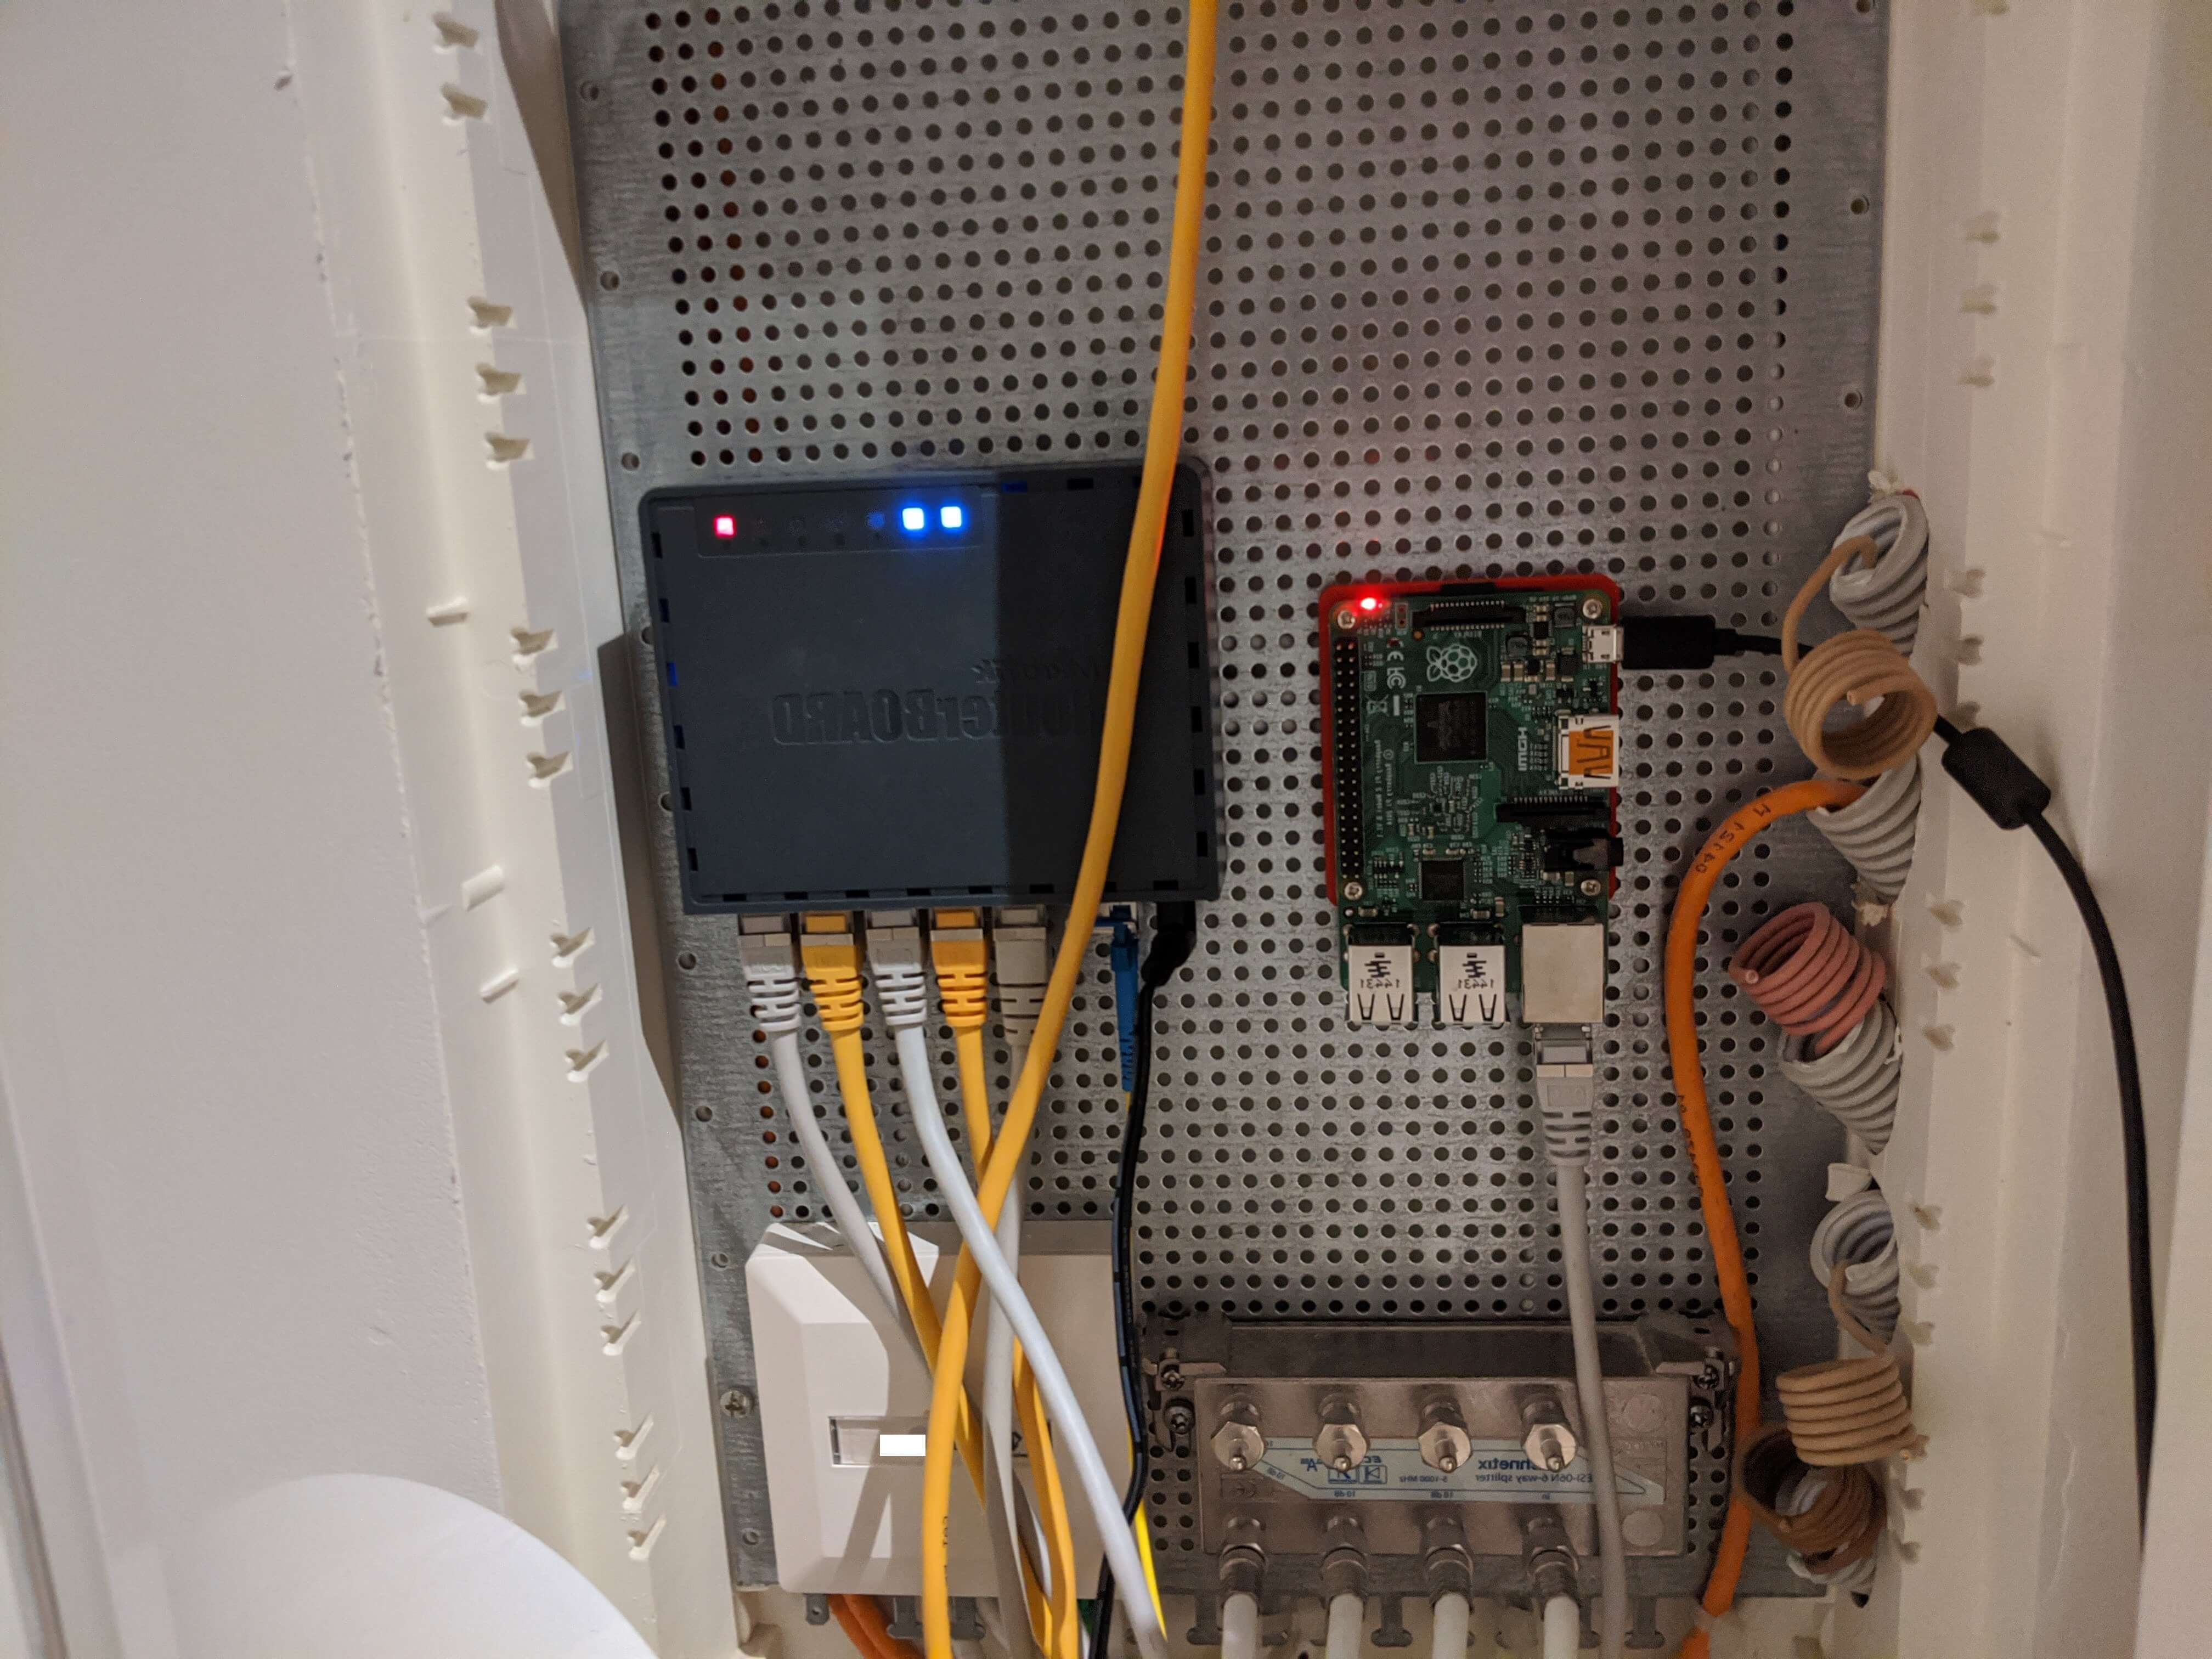
Iteration 2
The next step was to figure out how to mount my devices to the perforated mounting plate (Montageblech, gelocht, verzinkt).
For the hEX S this was simple, as Mikrotik (the manufacturer of the devices) states:
This device is designed for use indoors by placing it on the flat surface or mounting on the wall,
mounting points are located on the bottom side of the device, screws are not included in the package.
Screws with size 4x25 mm fit nicely.
But what about the Raspberry Pi?
Let's 3D print something I found a great Raspberry Pi Wall Mount
where I adapted the mount to fit the distance between the two screw holes.

I googeled that the correct screws are Blechschrauben 4.2x9.5mm.
Since you can not buy just a handful of these I own now a 100 of them.
(If you know me, and need these screws for something let me know)
For some reason they are awful to work with or I was holding it wrong.
They don't work to mount the router because the screw head does not fit the
hEX S mounting on the back.
And I could not really screw them into the plate.
I ended up just using random screws I had from things to make it happen.
Which brings us to the next iteration:
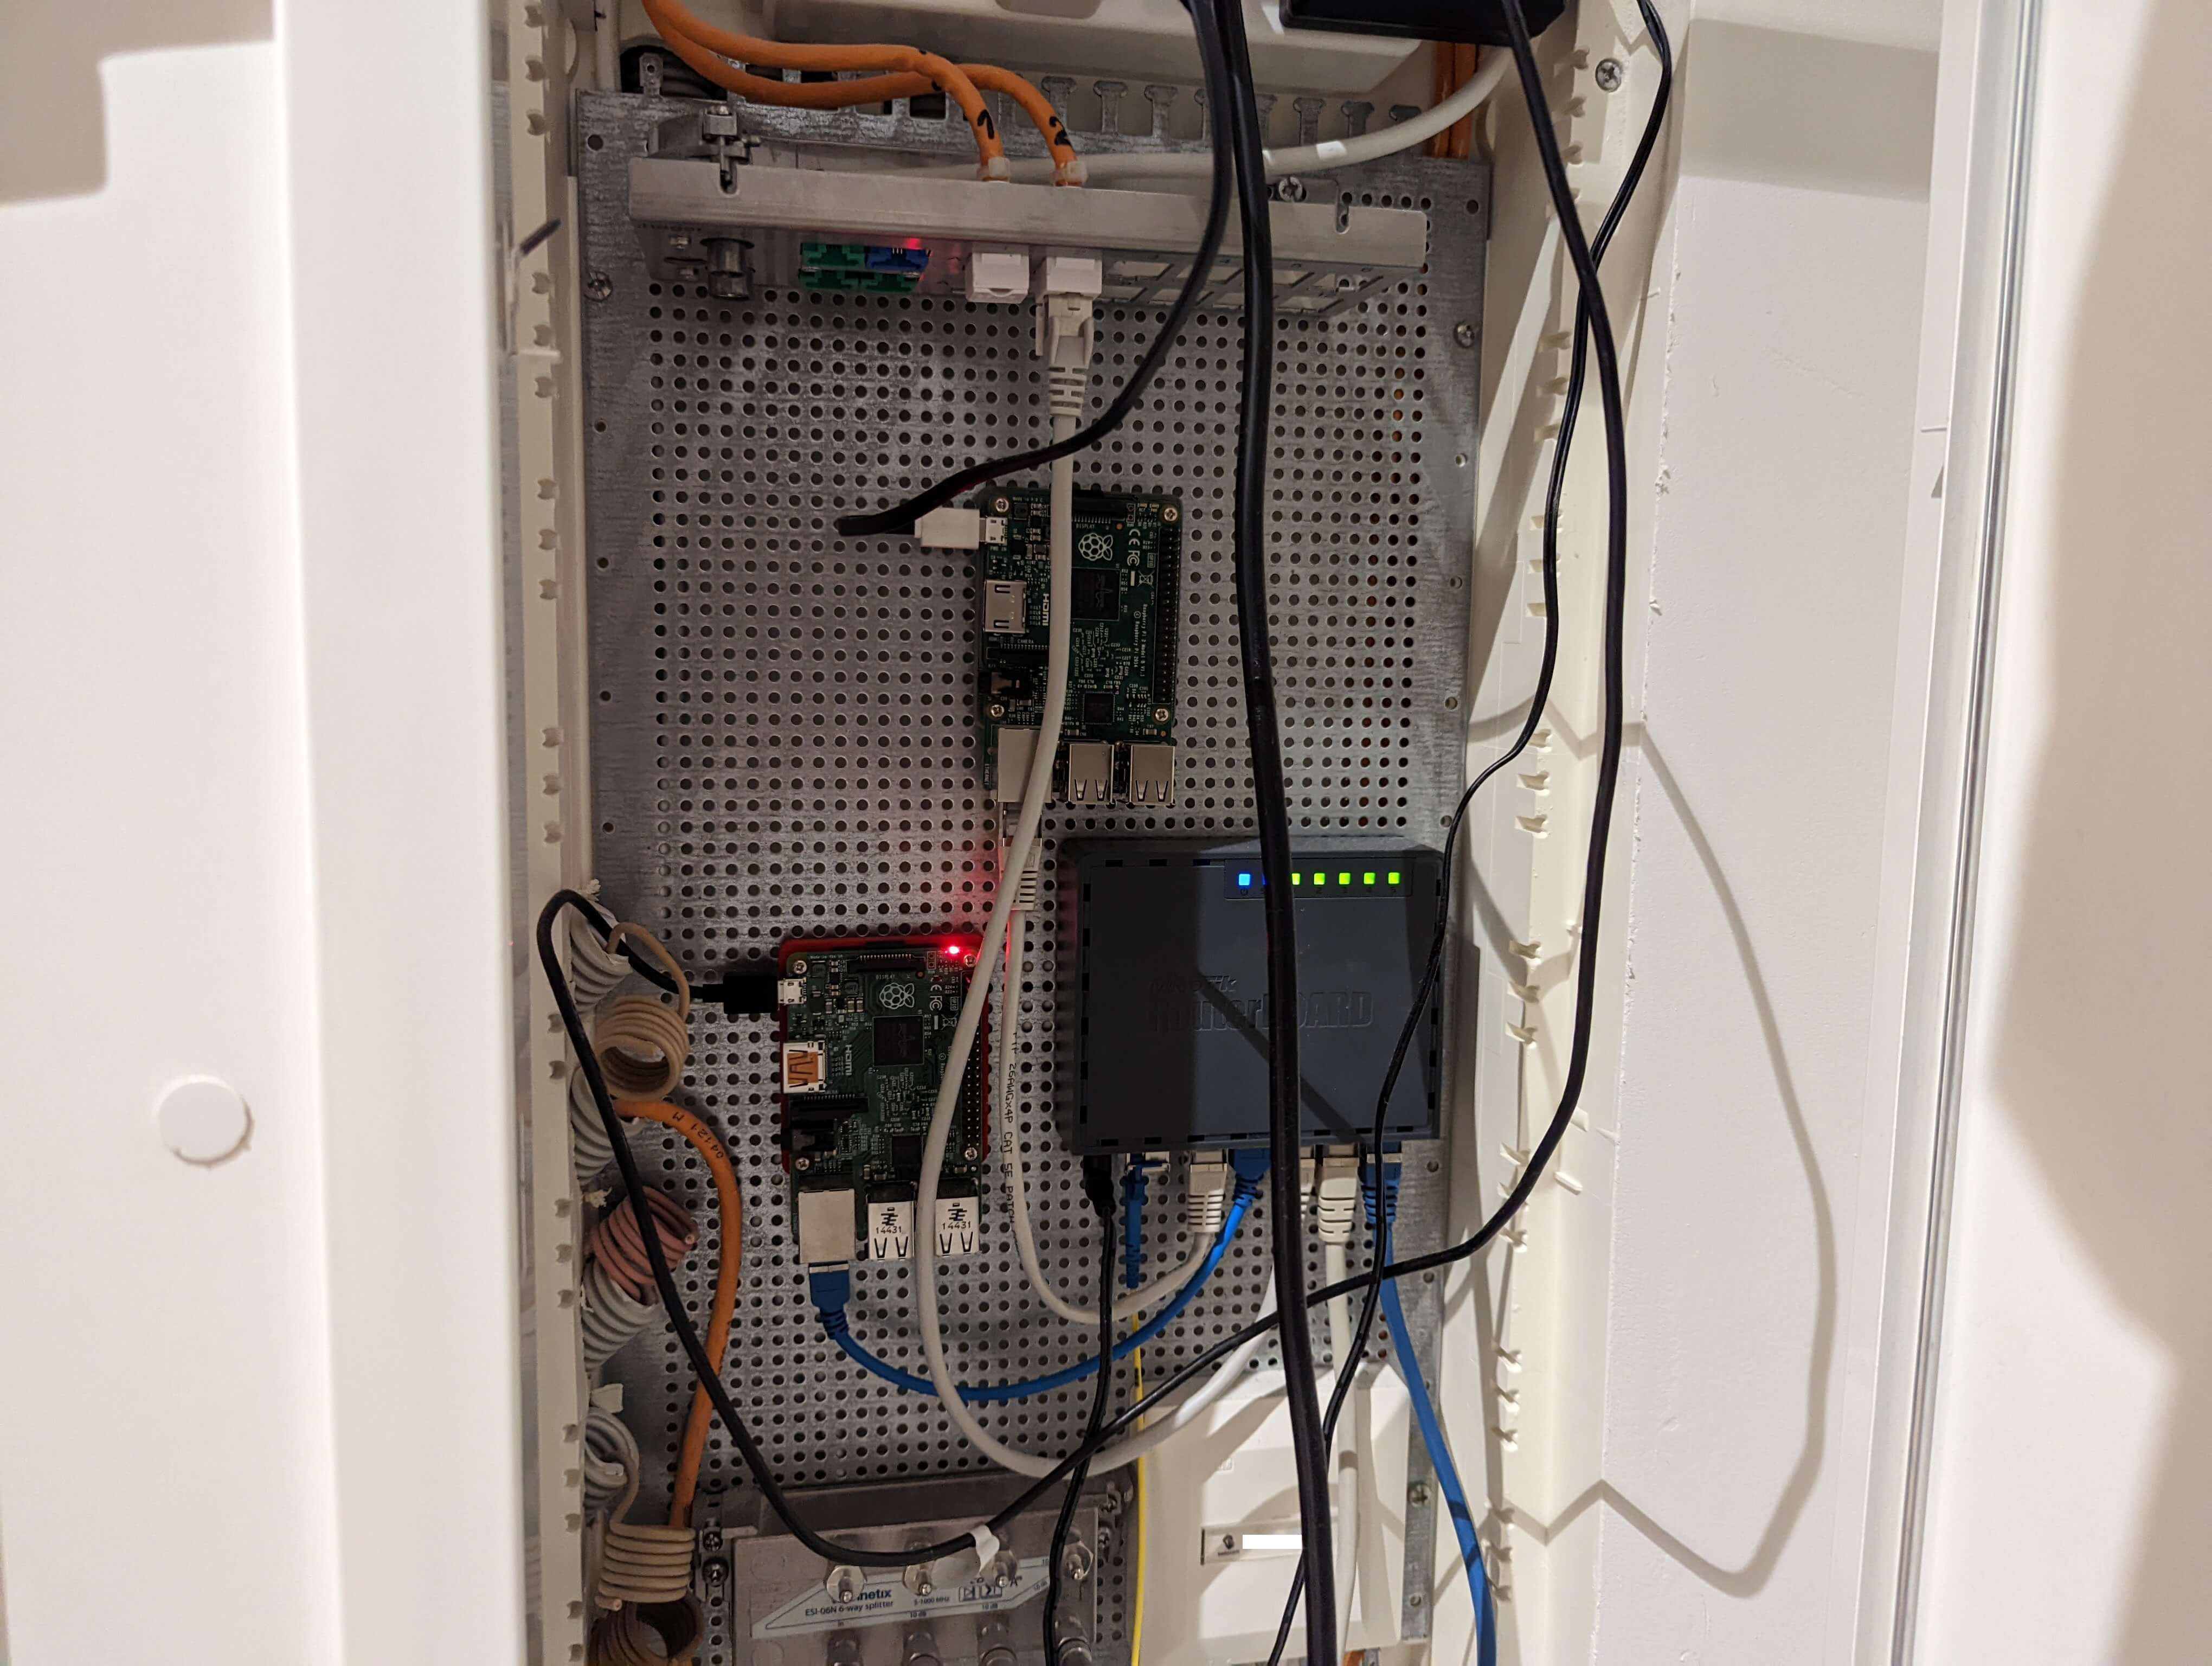
Iteration 3
And since then I improved the cable management a bit and
also mounted the second Raspberry Pi.
Which gives us the current state:
15 Jul 2022
This is a short blog post explaining how to
forward a port trough a jump host.
I needed this to access a web UI which was only accessible via a jump host.
Here is the situation:
+---------------+   +---------------------+    +----------------------------+
|               |   |                     |    |                            |
| You (Host A)  +-->| Jump Host (Host B)  +--->| Target Host (Host C)       |
|               |   |                     |    | Web interface on port 443  |
+---------------+   +---------------------+    +----------------------------+
To make it convenient we add most of the config into .ssh/config
Host HostB

Host HostC
  ProxyJump HostB
In reality you usually have some key and hostnames to configure:
Host HostB
  User userb
  Hostname 192.168.1.1

Host HostC
  User userc
  Hostname HostC
  IdentityFile /home/userc/.ssh/keyfile
  ProxyJump HostB
And thats all now we can forward a port from HostC by calling this:
ssh -N HostC -L 8000:localhost:443
And we can access the web UI from HostC on localhost:8000.
10 Sep 2021
I recently had some data which I wanted to display in something like a heatmap.
Because we humans are much better at spotting patterns on a visualization than
just raw numbers.
The data I was working with is a date with a intensity value.
This is in the form of a csv file which looks like this:
date,value
...
14-Jul-2021,
15-Jul-2021,1
16-Jul-2021,
17-Jul-2021,
18-Jul-2021,1
19-Jul-2021,2
20-Jul-2021,2
...
25-Jul-2021,2
26-Jul-2021,1
27-Jul-2021,
28-Jul-2021,1
29-Jul-2021,1
30-Jul-2021,
31-Jul-2021,
...
The idea is to display the value which is in this case not present (0), 1 or 2 on a
heatmap which uses month and day as x and y axis.
To achieve this a few steps are needed:
- Load the data from the csv file
- Convert the date string to a data
- Create two new columns, one with the day and one with the month
- Create a pivot table with month, day and the value
- Use the pivot table in reverse as input for the [
seaborn.heatmap]
And thats all that is needed. To create a heatmap which looks like this:
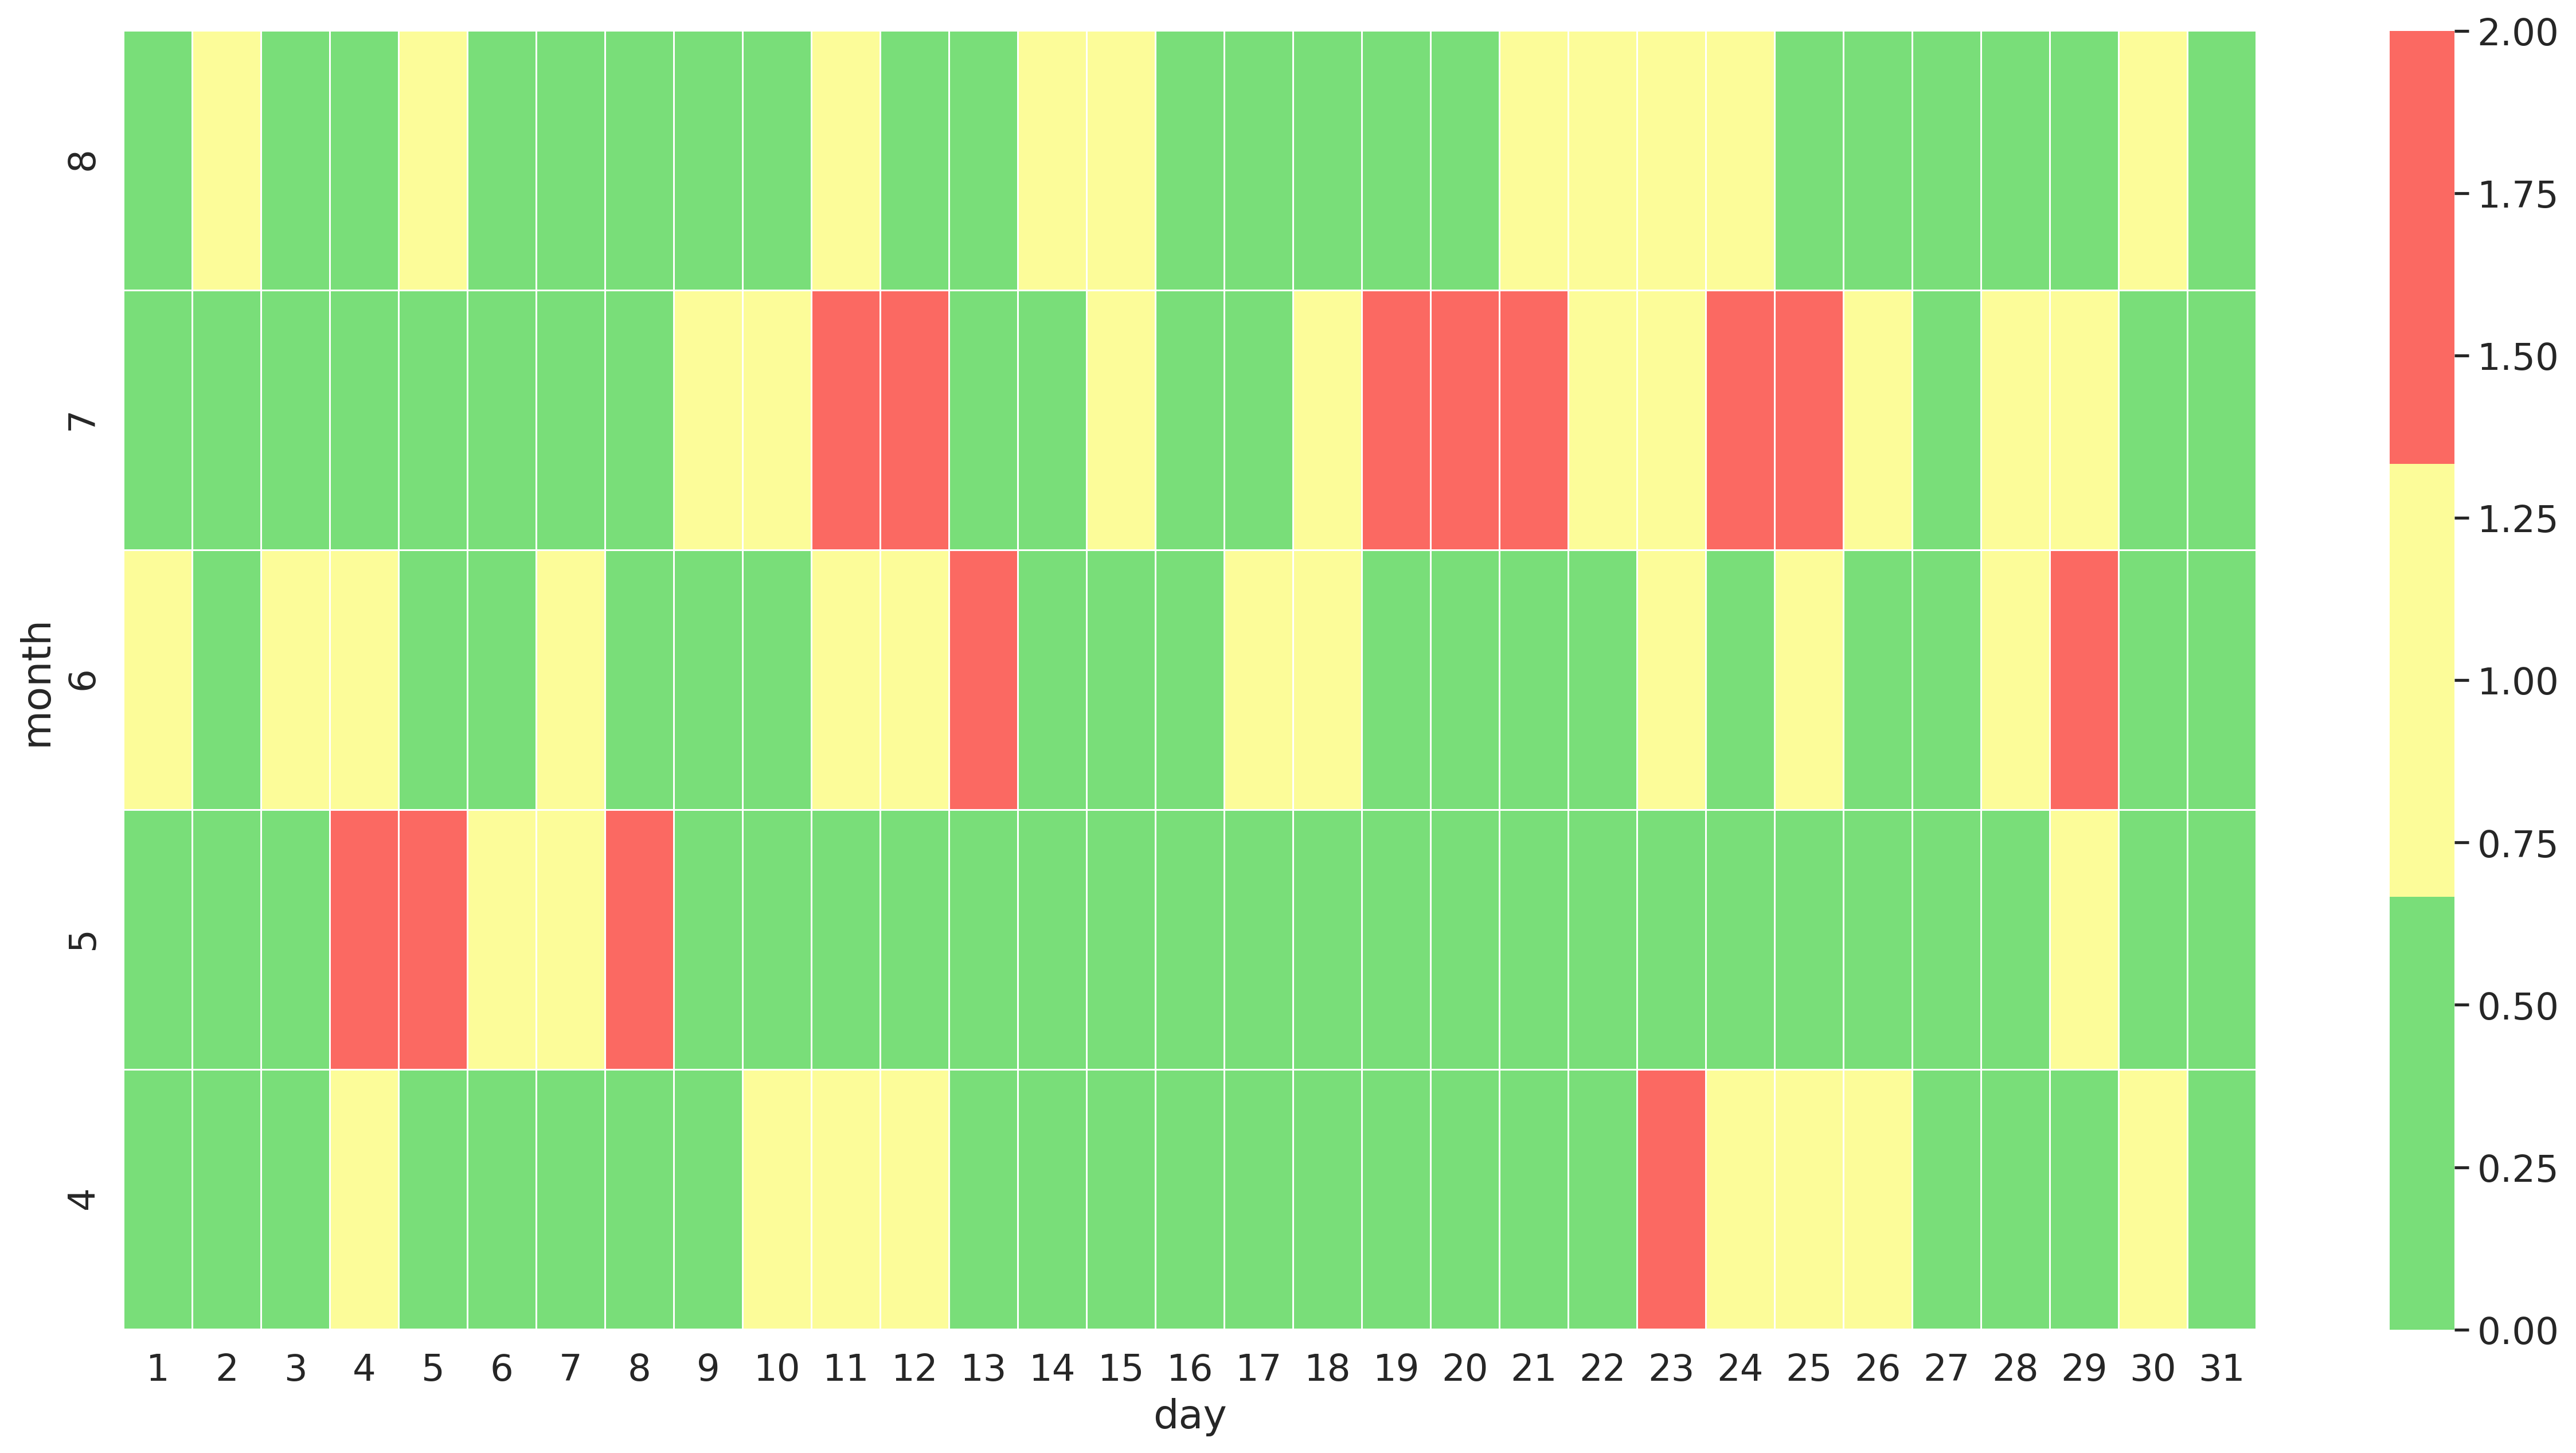
If you are interested in the actual code I used to create this
you can checkout the jupiter notebook I put into a git repository: jupiter-notebook-python-heatmap
21 Mar 2021
As you might know I am more of a ruby programmer.
But from time to time I use different things, like Python.
That is why we talk about my Python setup today.
A few things have happened since I last built some projects with Python.
One of these things is Poetry and the pyproject.toml.
Let's talk quickly about Poetry which promises:
"Python packaging and dependency management made easy".
The main focus is on dependency management,
for example Python finally gets a dependency lock file like ruby or npm.
It also handles virtual environments for you, which removes the need for
virtualenv and similar tools.
And it makes use of the new pyproject.toml file.
Which is one config file to configure all tools.
Read more about it here: What the heck is pyproject.toml?
FlakeHell is like the old Flake we all loved, only cooler!
It allows to integrate all linter into one thing and run them all together.
My Setup
Enough talk let's look at my current setup for a project.
This is my pyproject.toml file.
[tool.poetry]
name = "My Python Project"
version = "0.1.0"
description = "Python Project goes Brrrrrr"
authors = ["Me <email>"]
license = "BSD"

[tool.poetry.dependencies]
python = "^3.9"
pydantic = "*"

[tool.poetry.dev-dependencies]
pytest = "*"
sphinx = "*"
flakehell = "*"
pep8-naming = "*"
flake8-2020 = "*"
flake8-use-fstring = "*"
flake8-docstrings = "*"
flake8-isort = "*"
flake8-black = "*"

[tool.pytest.ini_options]
minversion = "6.0"
addopts = "--ff -ra -v"
python_functions = [
    "should_*",
    "test_*",
]
testpaths = [
    "tests",
    "builder",
]

[build-system]
requires = ["poetry-core>=1.0.0"]
build-backend = "poetry.core.masonry.api"

[[tool.poetry.source]]
name = "gitlab"
url = "https://$GITLAB/api/v4/projects/9999/packages/pypi/simple"

[tool.flakehell]
max_line_length = 100
show_source = true

[tool.isort]
multi_line_output = 3
include_trailing_comma = true
force_grid_wrap = 0
use_parentheses = true
ensure_newline_before_comments = true
line_length = 100

[tool.black]
line-length = 100

[tool.flakehell.plugins]
pyflakes = ["+*"]
pycodestyle = ["+*"]
pep8-naming = ["+*"]
"flake8-*" = ["+*"]

[tool.flakehell.exceptions."tests/"]
flake8-docstrings = ["-*"]
Let's look at this in detail.
We have [tool.poetry.dev-dependencies] where we list all our dev dependencies.
Big surprise I know :D.
First we see pytest for tests and sphinx for docs
and as already mentioned at the start I use FlakeHell with these plug-ins:
- pep8-naming
- flake8-2020
- flake8-use-fstring
- flake8-docstrings
- flake8-isort
- flake8-black
Checkout awesome-flake8-extensions and choose your own adventure!
All the configuration needed for pytest is in the tag [tool.pytest.ini_options].
Gitlab
Did you know that GitLab can host PyPI packages in the Package Registry?
Package Registry is a feature which allows to publish
private pip packages into a PyPI Package Registry.
We can deploy pip packages like this for example.
Where 9999 is our project id which we want to use as Package Registry.
deploy-package:
  stage: deploy
  only:
    - tags
  script:
   - python -m pip install twine
   - python setup.py sdist bdist_wheel
   - twine upload
       --username gitlab-ci-token
       --password $CI_JOB_TOKEN
       --repository-url $CI_API_V4_URL/projects/9999/packages/pypi
       dist/*
And to consume the pip packages I added:
[[tool.poetry.source]]
name = "gitlab"
url = "https://$GITLAB/api/v4/projects/9999/packages/pypi/simple"
Depending on your GitLab config you need some authentication for that,
which you can easily do with:
poetry config http-basic.gitlab __token__ $GITLAB_TOKEN
Checkout the GitLab documentation for all the details.
How to use it
Now with all this setup in place I still create a small Makefile.
Reason to create a Makefile is that this allows you to type even less.
install:
    poetry install
format:
    poetry run isort src tests
    poetry run black src tests
lint:
    poetry run flakehell lint src tests
test:
    poetry run pytest
As we can see here format, lint and test become super easy because all the setup code
is in pyproject.toml.